Choose Closet Shoe Shelves for Your Beacon Home Before Fall
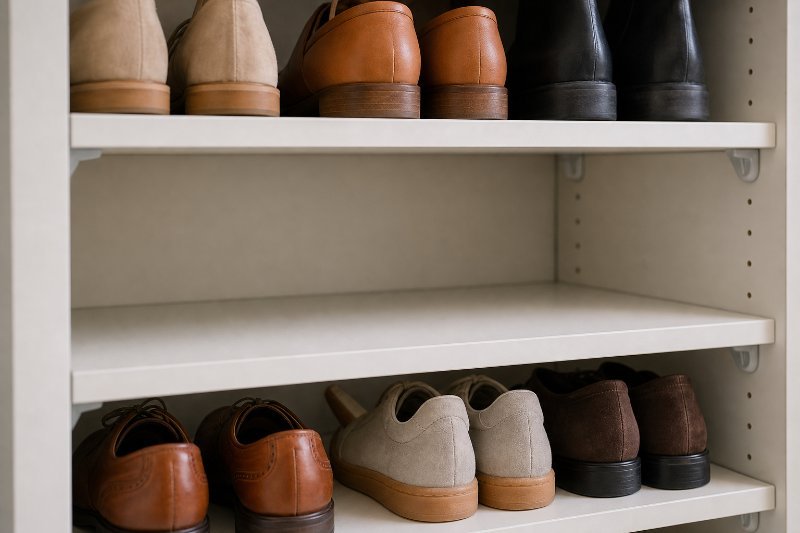
A closet can hold plenty of shoes and still feel impossible to use. Pairs disappear behind boxes. Sneakers form a pile on the floor. Dress shoes compete with hanging clothes. The real problem is rarely the number of shoes. It is usually poor spacing, weak shelving, or a layout that ignores how the closet is used.
Well-planned shoe shelves for a closet in Beacon, NY, turn that wasted lower space into practical storage. Shelf serves local clients from its physical location in Newburg, NY, providing reliable Construction Division 10 finishes such as Closet Shelving, Shower Doors, mirrors, and Bath Accessories. In-person appointments make it easier to compare materials, discuss measurements, and choose a system that fits the room.
The best shelf is not simply the one that holds the most pairs. It should make everyday shoes easy to reach, protect special footwear, and leave enough room for clothing. This guide explains why common setups fail, which shelf styles work best, what affects the project cost, and how to prepare for professional help.
Why Closet Shoe Storage Becomes Disorganized
Most closet floors become cluttered gradually. One pair lands near the door. Then another gets pushed under a shirt. Before long, the floor becomes a storage system with no structure.
Standard closets rarely account for real shoe collections
Basic closets often include one high shelf and a hanging rod. That works for clothing. It does little for shoes.
Footwear has different dimensions. A low sneaker does not need the same vertical clearance as a boot. Men’s shoes may require more depth than smaller flats. Shoe boxes need even more room. A single fixed shelf forces all of those items into one spacing pattern.
Useful closet shoe shelving for Beacon homes should reflect the actual collection. That includes:
The number of everyday pairs
Shoe width, length, and height
Boots or high-top footwear
Shoes stored inside boxes
Seasonal pairs used only occasionally
Space needed for future purchases
Counting shoes sounds basic. It is also one of the most valuable planning steps.
Deep shelves can hide more than they organize
A deep shelf may seem helpful because it provides more surface area. Yet excessive depth encourages two rows of shoes. The front row blocks the back row. Pairs become difficult to see and inconvenient to retrieve.
Shallow shelving often performs better for visible, daily storage. Deeper shelves may make sense for boxes, large footwear, or pull-out hardware. The correct depth depends on the shoes and the available walking clearance.
Poor vertical spacing wastes capacity
Large gaps above short shoes create dead space. Shelves placed too closely together make footwear hard to remove. Adjustable components solve part of this problem because shelf positions can change as the collection changes.
The goal is not to squeeze in every possible shelf. The goal is comfortable access. Fingers need room to grip a pair without scraping the shelf above it.
Weak supports cause sagging
Shoes become heavy in groups. Long shelves without proper support can bow over time. The risk increases with dense materials, storage boxes, or heavy boots.
Shelf span, material thickness, fastening method, and wall conditions all matter. Drywall alone is not always a suitable anchor point. Studs, blocking, masonry, or approved anchors may determine how the system should be secured.
Choosing the Right Shoe Shelf Configuration
There is no universal layout. The strongest design matches the closet dimensions, footwear types, and daily routine.
Fixed shelves provide simplicity
Fixed shelves offer a clean appearance and solid support. They work well when the collection is stable and the footwear has similar heights.
Their main limitation is flexibility. If boots replace sneakers later, the openings may no longer fit. Accurate planning matters because fixed spacing is harder to change after installation.
Adjustable shelves adapt over time
Adjustable shelving uses tracks, standards, or predrilled cabinet-style holes. Shelf positions can be moved without rebuilding the entire system.
This format is useful for:
Growing children
Changing seasonal footwear
Mixed shoe heights
Closets shared by two people
Collections likely to expand
Visible hardware may be a trade-off in some systems. Cabinet-style components can conceal more of the support structure, but they may require side panels or a fuller built-in design.
Flat and angled shelves serve different habits
Flat shelves maximize usable depth. Shoes sit securely and can often remain inside their original boxes. Cleaning is straightforward.
Angled shelves present footwear toward the user. They can make pairs easier to view, especially in a walk-in closet. However, they require a front lip or stop to prevent sliding. They may also consume more vertical room.
For many homeowners, a mixed layout works best. Flat shelves can hold casual footwear, while one angled section displays frequently worn or special pairs.
Cubbies create boundaries
Individual cubbies prevent shoes from drifting into neighboring spaces. They look orderly and make it easy to return each pair to a defined location.
Cubbies are less forgiving than open shelves. Compartments that are too narrow may not fit wide shoes. Open shelves offer more side-to-side flexibility, while cubbies provide stronger visual separation.
Pull-out shelves improve access in deep spaces
A pull-out shelf brings the stored items forward. This can be useful in deep closets where fixed rear storage would otherwise be difficult to reach.
The hardware requires clearance and proper installation. Pull-outs also cost more than simple fixed shelves. They are best used selectively, not automatically throughout the closet.
Boot storage needs its own plan
Tall boots should not be forced into standard shoe openings. Options include taller shelf bays, open floor sections, boot racks, or hanging boot hardware.
Boots also need enough width to avoid being crushed. Structured footwear lasts longer when shafts and uppers are stored without pressure from surrounding items.
Measurements That Shape a Successful Layout
Accurate measurements are the foundation of useful Beacon-area closet shoe shelves. Measuring only wall width is not enough. Doors, trim, baseboards, outlets, vents, and sloped ceilings can all affect the design.
Record the complete closet dimensions
Measure the width, height, and depth in several places. Walls are not always perfectly square. Use the smallest practical dimension when evaluating whether a component will fit.
Also record:
Door opening width
Door swing or sliding-door overlap
Baseboard height and projection
Existing rod and shelf positions
Access panels, switches, and outlets
Floor transitions or uneven surfaces
The position of wall studs, when known
A shelf hidden behind a sliding door may be technically installed but still hard to use. Access matters as much as capacity.
Measure representative shoes
Select the longest, widest, and tallest pairs in the collection. Measure those shoes rather than relying on shoe size alone. Two pairs marked with the same size may have very different exterior dimensions.
Add comfortable hand clearance. Shelves should not fit so tightly that footwear must be twisted or compressed during removal.
Separate daily and occasional storage
Daily shoes belong between roughly knee and waist height whenever the closet allows. That zone is easier to see and reach. Occasional footwear can sit higher or lower.
A practical arrangement may include:
Everyday pairs at comfortable reach
Dress shoes in a protected middle section
Seasonal pairs on upper shelves
Boots in taller lower openings
Shoe-care products in a small bin or drawer
This simple priority system reduces bending and searching.
Materials, Finishes, and Maintenance Trade-Offs
Material selection affects appearance, cleaning, durability, and price. It should also coordinate with the rest of the closet.
Wire shelving encourages airflow
Ventilated wire shelving allows air to circulate around footwear. Dust and small debris can fall through instead of collecting on a solid surface.
Thin heels may catch between wires, and soft shoes can sit unevenly. Shelf liners can create a flatter surface, although liners reduce some ventilation.
Melamine offers a smooth surface
Melamine shelving has a clean, finished face that is easy to wipe. It comes in multiple colors and wood-look patterns. Proper edge finishing protects the underlying panel and gives the installation a polished appearance.
Long unsupported spans can sag. Correct support spacing remains essential.
Wood provides a built-in appearance
Wood shelving can be painted or stained to coordinate with cabinetry and trim. It suits closets where appearance is a high priority.
Moisture, finish quality, and maintenance should be considered. Wet shoes should dry before being placed on finished wood. Removable trays can protect shelf surfaces from salt, dirt, and water.
Laminate and cabinet-style systems add structure
Panel-based systems can combine shoe shelves with hanging areas, drawers, and upper storage. They create a cohesive built-in look and make adjustable shelf holes easier to incorporate.
These systems require more material than stand-alone shelves. They also reduce a small amount of interior width because side panels occupy space.
What Cost and Installation Realistically Involve
The price of custom shoe shelves for a closet serving Beacon clients depends on scope. A short run of fixed shelving is different from a full panel system with pull-outs, angled shelves, and integrated clothing storage.
Major cost factors include:
Closet width and height
Number of shelves
Material and finish
Fixed versus adjustable construction
Pull-out or specialty hardware
Wall conditions and required supports
Removal of existing components
Trim, fillers, and finish details
Installation complexity
A low initial price does not always mean strong value. Shelves that sag, block the door, or fail to fit larger shoes may need correction later.
Preparation can keep the visit efficient
Before an appointment, remove loose items from the closet if practical. Keep representative shoes nearby. Photos of the current setup can help explain recurring problems.
It is also useful to set a rough priority. Decide whether capacity, appearance, adjustability, or easy cleaning matters most. Not every closet needs every feature.
Installation timing varies by product availability, customization, site readiness, and project size. Stock components may be simpler to coordinate. Cut-to-fit or specially finished materials can require additional preparation.
How to Start With a Clear Project Plan
Begin with a quick inventory rather than a product catalog. Count the pairs. Group them by height and frequency of use. Note which shoes remain boxed.
Then create a short wish list:
More visible pairs
Clear floor space
Dedicated boot storage
Adjustable spacing
Easier cleaning
Room for a growing collection
Coordination with existing closet finishes
Bring measurements, photos, and the wish list to an in-person consultation. Seeing samples in person can clarify color, texture, shelf thickness, and hardware quality. It also provides an opportunity to discuss related finishing needs, including Closet Shelving, Shower Doors, mirrors, and Bath Accessories.
Ask direct questions about shelf span, support, adjustability, cleaning, and access. A reliable recommendation should account for the room and its intended use, not merely the number of products that can fit inside it.
A Better Closet Starts With the Right Fit
Effective shoe storage makes each pair visible, reachable, and easy to return. The strongest plan balances shelf depth, vertical clearance, support, and flexibility. It also leaves room for the closet to change.
For shoe shelving in a Beacon closet, Shelf can review the wall, room, footwear collection, and intended use before recommending a layout. For a free estimate, call or text
(845) 564-7400
and share a few details about the project, or arrange an in-person visit at the Newburg location to compare practical options.
Disclaimer:
The information provided in this article is for general informational and educational purposes only. Every home, space, and project is different, and product options, materials, measurements, installation requirements, pricing, and results may vary. For recommendations specific to your project, please consult with a Shelf design professional or another qualified professional.