How to Use Mirrors to Brighten Your Beacon Home
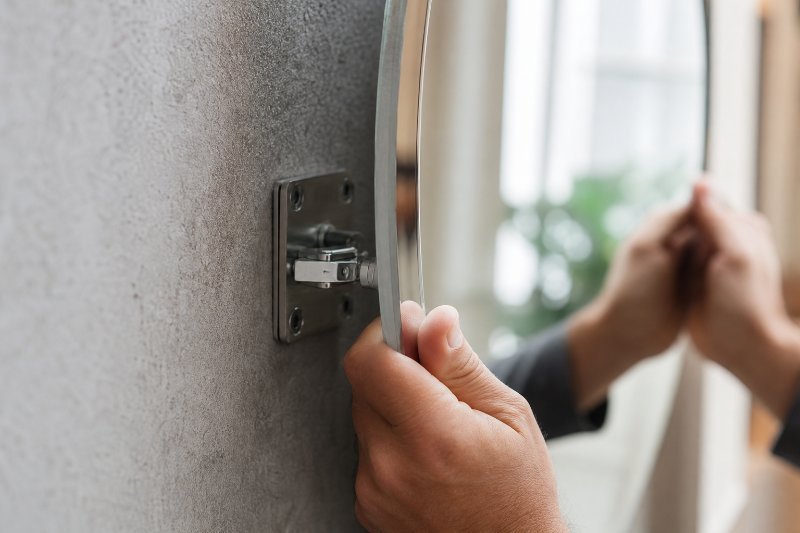
A mirror can look simple on a product page. On the wall, every detail becomes visible. A slightly wrong width can crowd a vanity. Poor placement can create shadows. Thin glass, weak backing, or improper fasteners can turn a clean design feature into a safety concern.
Choosing mirrors for Beacon, NY homes requires more than picking a shape. The room, wall material, lighting, nearby fixtures, and intended use all matter. Shelf serves local homeowners, contractors, designers, and property managers from its physical location in Newburg, NY. Clients can arrange an in-person visit or appointment to review options and project details.
The right mirror should feel like part of the room. It should provide a clear reflection, fit the architecture, and remain securely mounted. This guide explains how to plan a mirror project from the first measurement through professional installation.
What Makes a Mirror Right for the Room?
Mirrors perform several jobs at once. They support grooming, reflect light, create visual depth, and help define the style of a space. The best choice balances all four.
Start With the Mirror’s Main Purpose
Before considering finishes or shapes, decide what the mirror must do.
Common applications include:
Vanity mirrors:
Used for grooming, makeup, shaving, and daily routines.
Full-length mirrors:
Installed in bedrooms, closets, dressing areas, and entry spaces.
Decorative mirrors:
Selected primarily for visual interest and reflected light.
Wall-to-wall mirrors:
Often used in home gyms, studios, salons, and commercial interiors.
Medicine cabinet mirrors:
Designed to combine reflection with concealed storage.
Accent mirrors:
Positioned above consoles, fireplaces, or furniture.
A bathroom mirror needs useful lighting and moisture-resistant installation materials. A closet mirror needs enough height and viewing distance to show an outfit clearly. A gym mirror needs accurate reflection, consistent alignment, and secure support across a larger surface.
Defining the purpose prevents expensive guesswork.
Choose Between Stock and Custom Sizes
Stock mirrors work well where wall dimensions and fixture placement are flexible. They are readily available and can be practical for straightforward projects.
Custom-cut glass is valuable when the mirror must align with:
A specific vanity width
Existing tile or backsplash edges
Wall outlets or switches
Light fixtures
Sloped ceilings
Built-in cabinetry
Closely spaced trim
An unusual architectural opening
Custom sizing can also reduce awkward gaps. A mirror that is one or two inches too narrow may appear accidental, especially above a built-in vanity. Precise proportions make the finished room look intentional.
For mirrors in Beacon, NY, homeowners should also consider how older walls, renovated bathrooms, and newer construction can require different measuring and mounting strategies.
Understand Mirror Thickness and Edge Options
Mirror glass is available in different thicknesses. Larger installations generally benefit from thicker material because it provides greater rigidity and a more substantial appearance. The proper thickness depends on the size, support system, and application.
Edges affect both style and safety:
Seamed edges
remove sharpness but are normally concealed within a frame or channel.
Flat-polished edges
create a smooth, finished perimeter suitable for exposed installations.
Beveled edges
add an angled border that catches light and gives the mirror a more decorative appearance.
Framed edges
introduce color, texture, and architectural definition.
Exposed edges should be professionally finished. A raw glass edge is not appropriate for an accessible location.
How to Measure and Plan a Mirror Installation
Accurate measurement is essential, but measuring only the open wall is not enough. Every fixed object around the installation area can affect the final dimensions.
Measure the Wall in Multiple Places
Walls are not always square. Tile may vary slightly from one side to the other. A ceiling can slope. A vanity may not sit perfectly level.
Measure the available width at the top, middle, and bottom of the proposed mirror location. Do the same for height. Use the smallest measurement as the starting point, then allow an appropriate installation clearance.
Do not assume two matching vanities have identical dimensions. Measure each position separately.
Map Every Obstruction
Record the location of anything that could interfere with the glass or mounting hardware:
Faucets
Backsplashes
Sconces
Outlets
Switches
Towel rings
Shelves
Window trim
Cabinet doors
HVAC controls
Also check whether doors, drawers, or medicine cabinets swing into the planned area. A beautiful mirror is not useful if it blocks another feature.
For a Beacon mirror project involving tile, note where grout joints fall. The installer may need different bits, anchors, or mounting positions depending on the surface.
Plan the Viewing Height
Vanity mirrors should serve the people who use the room most often. A common mistake is centering the mirror only on the wall. It may look balanced but sit too high for a shorter user or too low for a taller one.
Useful questions include:
Who uses this room every day?
Will children use the mirror?
Is anyone seated while using it?
Does the faucet limit the lower edge?
Are lights planned above or beside the glass?
Full-length mirrors need suitable viewing distance. A narrow hallway may not provide enough room to see a complete reflection, even if the glass itself is tall.
Coordinate Lighting Before Installation
A mirror reflects the lighting it receives. It cannot correct a poorly lit room by itself.
Side lighting often provides more even facial illumination than a single fixture above the mirror. Overhead-only lighting can create shadows below the eyes and chin. If electrical work is still underway, finalize the mirror dimensions first so fixtures can be placed accurately.
Avoid positioning a mirror where it reflects an exposed bulb, an unfinished doorway, or clutter that occupants would rather not see. Think about the reflected view from several positions in the room.
Mounting Methods and Safety Considerations
A secure installation depends on the mirror’s size, weight, backing, wall structure, and exposure to moisture. No single mounting method fits every project.
Clips, Channels, Adhesive, and Mechanical Support
Common mounting systems include:
Mirror clips:
Visible fasteners that support the glass at selected points.
J-channels:
Continuous metal supports commonly used along the bottom edge.
Mirror mastic:
A specialized adhesive formulated for compatible mirror backing.
French cleats:
Interlocking supports often used with framed mirrors.
Standoffs:
Decorative hardware that holds glass slightly away from the wall.
Hidden brackets:
Concealed systems used with certain frames or fabricated assemblies.
Large mirrors may use more than one form of support. Adhesive must be specifically approved for mirrors. General construction adhesive can damage the reflective backing and cause dark marks that cannot be cleaned away.
Custom mirrors serving Beacon properties should be planned according to the actual wall, not selected with a mounting method as an afterthought.
Wall Material Changes the Installation
Drywall, plaster, masonry, tile, and wood blocking require different fasteners. A screw that works in a stud may not be safe in hollow drywall. Drilling through porcelain tile requires different tools than drilling through softer ceramic material.
Older plaster can crack if handled carelessly. Tile can chip. Hidden plumbing or electrical lines may also run behind bathroom walls. Professional installers evaluate these conditions before drilling.
For heavier pieces, structural support is especially important. If a renovation is still open, adding blocking inside the wall can provide a stronger attachment point for the future mirror.
Bathrooms Need Moisture-Aware Planning
Bathrooms expose mirrors and hardware to humidity, splashing, cleaning products, and temperature changes. Ventilation matters. So does leaving suitable space around surfaces where moisture could collect.
Black marks near mirror edges may indicate deterioration of the reflective coating, sometimes called desilvering. Common contributors include age, harsh chemicals, persistent moisture, and edge damage.
Use a soft, lint-free cloth and a mirror-safe cleaner. Spray the cloth rather than saturating the mirror’s edges. Avoid abrasive pads and aggressive chemicals.
Common Mirror Planning Errors to Avoid
Many problems begin before the glass reaches the wall. Careful planning protects both the mirror and the surrounding finishes.
Ordering Before Fixtures Are Final
Vanities, faucets, tile, outlets, and light fixtures should be confirmed before final mirror measurements. Product specifications can differ from rough plans. Even a small change in backsplash height can affect the available glass area.
Measure the completed or nearly completed space whenever possible.
Assuming the Wall Is Flat
A large mirror can reveal wall irregularities. If the surface bows, the glass may not sit evenly. Adhesive contact can be inconsistent, and edges may appear misaligned with nearby finishes.
Minor conditions may be manageable. Significant unevenness may require wall preparation or a different mounting approach.
Picking Style Without Checking Proportion
A tiny mirror above a wide vanity can feel disconnected. An oversized framed mirror can overwhelm lights and cabinetry. As a practical starting point, many vanity mirrors are slightly narrower than the vanity, but the ideal size depends on the complete composition.
Use painter’s tape to outline the proposed dimensions on the wall. View it from the doorway and normal standing positions. This low-cost test catches proportion problems early.
Treating Every Mirror as a DIY Project
Small, lightweight framed mirrors may be reasonable do-it-yourself projects for people with suitable tools and wall knowledge. Large sheets, close-fitting custom pieces, and installations over tile carry greater risk.
Glass is heavy and unforgiving. A measurement error can make a custom piece unusable. Improper lifting can injure the installer or damage flooring, counters, and plumbing fixtures. Professional mirror installation for Beacon clients is particularly valuable where precision, drilling, or substantial weight is involved.
How Mirrors Fit Into a Coordinated Interior Project
A mirror rarely exists in isolation. Its size and placement affect the rest of the room.
In a bathroom, coordinate the mirror with Shower Doors and Bath Accessories. Hardware finishes do not need to match perfectly, but they should feel related. Brushed nickel, matte black, chrome, and brass each create a different visual direction.
In a dressing area, combine a full-length mirror with Closet Shelving that keeps clothing, shoes, and accessories visible. Leave enough open floor area for a person to step back. Consider whether shelving casts shadows or appears prominently in the reflection.
During a broader renovation, settle these relationships early:
Mirror dimensions relative to cabinetry
Clearance around shower glass
Towel bar and robe hook positions
Lighting alignment
Storage access
Reflected sightlines
Hardware finishes
This coordinated approach produces a cleaner installation and reduces last-minute compromises.
Getting mirrors beacon ny right makes a real difference, and Shelf can help you do exactly that. The easiest way to begin is to call
845) 564-7400
for call or text shelf at
(845) 564-7400
for a free estimate. Shelf is based in Newburg, NY and proudly serves the Beacon, NY area.
Disclaimer:
Disclaimer: The information provided in this article is for general informational and educational purposes only. Every home, space, and project is different, and product options, materials, measurements, installation requirements, pricing, and results may vary. For recommendations specific to your project, please consult with a Shelf design professional or another qualified professional.