The Ultimate Guide to Bathroom Mirror Sizes and Placement
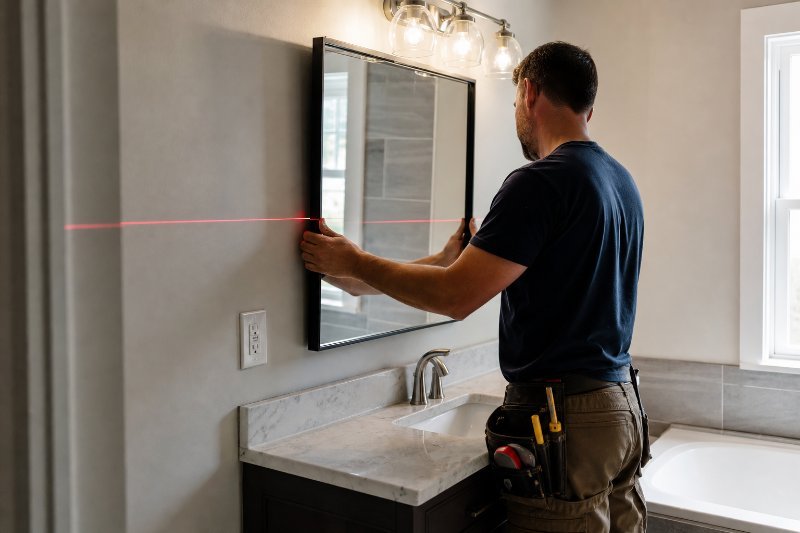
A bathroom mirror can be perfectly level and still feel wrong. It may sit too high for a shorter family member. It may reflect a ceiling fixture instead of the person standing at the sink. Or it may crowd the backsplash, sconces, and nearby cabinet.
The problem usually starts before installation. A mirror was chosen from a product photo, but the actual wall was never mapped. Vanity width, faucet height, lighting, outlets, tile joints, and sightlines all compete for limited space.
A better process begins with careful measurements and a simple wall sketch. That preparation helps the mirror support daily grooming, distribute light effectively, and look intentional within the room. The steps below apply to framed, frameless, round, rectangular, and custom-cut bathroom mirrors.
Start With the Vanity, Wall, and User
Mirror planning is not just about measuring an empty rectangle above the sink. The entire vanity zone matters. Begin with the fixed elements, then work inward toward the mirror.
Measure the usable wall area
Use a metal tape measure and record the wall width above the vanity. Measure at several heights rather than assuming the walls are parallel.
Note the position and dimensions of:
The vanity top and backsplash
Faucets and handles
Medicine cabinets
Outlets and switches
Sconces and ceiling fixtures
Tile borders and grout lines
Windows and trim
Adjacent cabinets
Towel rings or bars
Sloped ceilings or soffits
Measure from finished surface to finished surface. If tile will be installed later, account for its thickness and layout. A rough framing measurement does not represent the final opening.
Older homes can have walls that lean or corners that are not square. A mirror sized tightly to the smallest measurement may fit, but it can make uneven gaps more visible. Deliberate breathing room is usually more forgiving.
Use the vanity as the visual anchor
The vanity provides the strongest reference point. A mirror commonly looks balanced when it is narrower than the vanity rather than extending past its edges.
Homes & Gardens recommends a mirror measuring roughly 70% to 90% of the vanity width
.
That range is a starting point, not an automatic answer. A 48-inch vanity, for example, could visually support a mirror around 34 to 43 inches wide. The final width depends on lighting, storage, wall trim, and whether the sink is centered.
For a single vanity, try these alignment options:
Center the mirror over the sink.
Center it over the vanity cabinet.
Align it with the faucet when plumbing placement controls the sightline.
Use an intentionally offset mirror only when another element balances the composition.
The sink and cabinet are not always centered with each other. Choose the line that looks most natural from the doorway and from directly in front of the basin.
Measure the people who will use it
A mirror should serve actual users, not an abstract installation standard. Consider the heights of adults, children, and anyone who may need seated access.
Stand at the sink and mark approximate eye level with removable painter’s tape. Repeat this for the shortest and tallest regular users. The reflective surface should include comfortable face and upper-body views without requiring anyone to crouch or stretch.
Do not position the mirror solely by its center point. Two mirrors can share the same center while providing very different usable views. The top and bottom edges determine who can see comfortably.
Choose Mirror Dimensions That Fit the Room
Width establishes visual balance. Height controls function and the sense of space. Both must be considered before choosing a standard product or ordering custom glass.
Determine the width before the height
First, subtract the space required for side lighting, trim, cabinets, and visual margins. Then compare the remaining width with the vanity.
A framed mirror needs additional attention. Its listed dimensions may include the frame, while the reflective glass is smaller. A thick frame can reduce the usable reflection by several inches.
For frameless mirrors, the outer glass dimensions define both the physical footprint and reflective area. Edge treatments, such as polished or beveled edges, do not usually require the visual weight of a large frame. Still, enough space should remain around the perimeter to make installation and cleaning practical.
Tape the proposed outline directly on the wall. View it from:
The bathroom doorway
The shower entrance
The toilet area
The main standing position at the sink
A seated position, where applicable
Painter’s tape provides a more accurate impression than holding a tape measure in the air. Leave the outline in place for a day. Awkward proportions often become obvious after several normal bathroom visits.
Set a functional lower edge
The mirror should begin high enough to clear the backsplash, faucet, and any wall-mounted controls. It should also begin low enough to provide a useful reflection.
Check the faucet at full height. If the spout or handles extend above the backsplash, leave sufficient clearance so hands can operate them without touching the glass. Extra room can also make it easier to wipe the countertop and clean the mirror’s lower edge.
A small gap above the backsplash creates separation. A larger gap may be necessary when the wall includes decorative tile, a shelf, or tall faucet hardware. Whatever the choice, make the gap look intentional. An unexplained one-inch sliver can appear accidental.
Set the top edge around sightlines and fixtures
The top of the mirror should provide a clear view for the tallest regular user while respecting overhead lighting and ceiling details. It does not need to align with the top of a door or window, but nearby horizontal lines can guide the decision.
Avoid pushing the glass tightly against a light fixture. Fixtures require room for shades, bulbs, mounting plates, and maintenance. Their light also needs space to spread across the face instead of creating a bright patch at the mirror’s top.
Round and arched mirrors need special care. Their highest point may clear the fixture while their curved sides leave unexpected gaps. Tape the actual shape, not just its overall width and height.
Position the Mirror for Better Bathroom Lighting
A mirror does not generate light unless it has integrated illumination. It reflects and redirects the light already in the room. Its position can either help that lighting plan or expose its weaknesses.
Prioritize light on the face
Strong light directly overhead can create shadows beneath the eyes, nose, and chin. Side lighting is often more useful for shaving, applying makeup, and other detailed tasks because it reaches both sides of the face.
This Old House advises placing fixtures on each side of the mirror about 30 to 40 inches apart
. The exact arrangement still depends on mirror width, fixture size, and the people using the vanity.
For even illumination:
Position paired sconces at similar heights.
Keep fixture spacing symmetrical where the layout allows.
Avoid letting a frame block part of a light source.
Confirm that cabinet doors will not strike a fixture.
Check for glare from exposed bulbs.
Evaluate the setup while standing at the sink, not only from the doorway.
Place temporary lamps near proposed sconce positions if electrical rough-in has not started. This simple test can reveal facial shadows before wiring and tile make changes expensive.
Build lighting in layers
Vanity lighting has a specific job, but it should not carry the entire bathroom. Ambient lighting provides general visibility. Task lighting supports grooming. Accent lighting adds depth or draws attention to architectural details.
This layered approach aligns with
National Kitchen & Bath Association findings on bathroom design
, which report that effective lighting uses multiple layers and levels, with 92% of respondents agreeing that task lighting must always be included.
Before fixing the mirror location, switch on every planned light source. Look for hard shadows, dark corners, and reflections from bright bulbs. Also check the bathroom at night. Daylight can hide problems that become obvious after sunset.
Control window reflections and glare
A window opposite the mirror can brighten the room, but direct sunlight may produce glare. A window beside the vanity can light one side of the face much more strongly than the other.
Stand at the sink during different daylight conditions. Notice whether the mirror reflects direct sun, an uncovered bulb, or a distracting view through an open doorway. Window coverings and dimmable fixtures can help, but mirror placement remains the first control.
Lighted mirrors require another planning layer. Their electrical connection, driver, wall clearance, and switching method should be confirmed before installation. Electrical work should be completed by a qualified professional in accordance with applicable requirements.
Adapt the Layout to the Vanity Style
Bathroom layouts rarely match showroom displays exactly. Double sinks, narrow powder rooms, medicine cabinets, and wall-mounted faucets each change the measuring process.
Plan mirrors for double vanities
A double vanity can use one wide mirror or two separate mirrors. Neither option is universally better.
One large mirror can create a continuous reflective surface and visually connect the two sinks. Measure the entire vanity, then confirm that sconces, outlets, and cabinetry do not interrupt the proposed glass area.
Two mirrors give each basin a defined zone. Center each mirror over its own sink, then compare the outer margins and the gap between them. The arrangement should look balanced across the full vanity, not merely correct over each faucet.
For paired mirrors, verify all four vertical edges with a level or laser. Small height differences become obvious when identical shapes sit side by side.
Work carefully in small powder rooms
A powder room may have a narrow wall, an off-center sink, or a door that opens toward the vanity. A mirror that fills nearly every inch can make the wall feel crowded and complicate installation.
Use the doorway sightline as a design check. The mirror should not create an uncomfortable direct reflection of the toilet or reveal a private area in an adjoining room.
A taller mirror can add useful reflection without consuming extra horizontal space. A round mirror can soften a room dominated by square tile and cabinetry. Still, shape should follow the available wall area. Forcing a large circle between closely spaced fixtures usually creates pinched gaps.
Account for medicine cabinets and storage
Recessed and surface-mounted medicine cabinets project differently from the wall. Their doors also need room to swing without hitting sconces, side walls, or trim.
Measure the cabinet body and the full door path. Open adjacent cabinet doors at the same time. Hardware conflicts often appear only when two doors are tested together.
If storage is more important than a seamless wall mirror, a mirrored medicine cabinet may be practical. If a broad reflection is the priority, a separate mirror paired with vanity or closet storage may provide a cleaner result.
Coordinate with wall-mounted faucets
Wall-mounted faucets create a strong relationship between plumbing and mirror placement. The mirror’s bottom edge must clear the spout, handles, and any decorative escutcheons.
Because plumbing penetrations are difficult to move after tile installation, confirm the faucet and mirror dimensions together. Do not select each item independently and hope the proportions work later.
Verify Everything Before Installation
Good measurement includes a second check. It also accounts for how the mirror will be supported.
Create a full wall elevation
Draw the vanity wall on graph paper or in a simple digital sketch. Add dimensions for the vanity, sink centerline, faucet, backsplash, mirror, lights, outlets, and ceiling.
Label finished dimensions clearly. Then compare the drawing with the physical room.
A useful verification sequence includes:
Measure the vanity width.
Mark the sink and faucet centerlines.
Mark the mirror’s proposed outer edges.
Mark fixture backplates and shades.
Test door and cabinet swings.
Confirm top and bottom sightlines.
Check all marks with a level.
Measure the taped outline again.
Have another person review the layout. Fresh eyes often catch an outlet hidden behind the proposed glass or a mirror edge that nearly touches cabinet trim.
Identify the wall material and support needs
Drywall, plaster, tile, masonry, and wall panels require different drilling and mounting methods. Mirror weight, thickness, frame construction, and mounting hardware also matter.
Large mirrors may use clips, channels, mechanical fasteners, mirror-compatible adhesive, or a combination selected for the product and wall. Not every adhesive is appropriate for mirror backing. Improper products can damage the reflective coating or fail over time.
Before drilling, identify possible electrical wiring and plumbing behind the wall. Bathrooms concentrate water and power in a small area. Guessing is not a safe installation method.
Inspect the finished position
After installation, check that the mirror is level, stable, and evenly spaced from nearby finishes. Look along the edges for pressure points or unsupported areas.
Then test the bathroom as it will be used:
Turn on every lighting layer.
Stand at the sink at normal distance.
Open cabinets and doors.
Operate the faucet.
View the mirror from multiple heights.
Check reflections from the doorway.
Confirm that edges are accessible for cleaning.
A successful mirror placement should feel natural. Users should not need to think about where to stand or how to tilt their heads.
A Well-Placed Mirror Starts on Paper
The strongest bathroom mirror layouts connect three elements: the vanity, the user, and the lighting. Measure the finished wall carefully. Establish practical sightlines. Reserve room for fixtures, hardware, and cleaning. Then test the proposed dimensions with a taped outline before committing to glass.
A mirror plan that works on paper still needs to fit the real wall, room, and intended use. For a free estimate tailored to those details, call or text Shelf at
(845) 564-7400
and share a few details about the project. Shelf can assist in person with mirrors, shower doors, closet shelving, and bath accessories, and the team can also provide appointment or location directions.
Sources
Homes & Gardens, “How To Choose a Bathroom Mirror”
This Old House, “A Lesson in Bathroom Lighting”
National Kitchen & Bath Association, “Bathrooms Are Getting Bigger, Brighter, and Better Organized”
Disclaimer:
The information provided in this article is for general informational and educational purposes only. Every home, space, and project is different, and product options, materials, measurements, installation requirements, pricing, and results may vary. For recommendations specific to your project, please consult with a Shelf design professional or another qualified professional.